HET FA-18: Use an audible countdown timer for flights

Problem: When flying the FA-18 (or any fast moving aircraft), it’s dicey to take your eyes off of it, even for a moment…  Even for, say, looking at the time left on the flight!  I would glance at my countdown timer and when I looked back at the jet, it was often rolling to one side or the other. Kinda scary. Though my radio beeps when time has expired, I like to know how much time is left during the flight.

Solution: Buy a cheap, audible countdown timer, so you don’t have to look.

I was able to google some audible countdown timers, but they were more than I wanted to pay for. These were very nice units made for the blind. Some were meant for a kitchen countertop, so they really weren’t portable for RC.

Then I got a great search hit. Turns out that paintball players use audible countdown timers. Most paintball games have a set duration before the game is over.  And you really want to keep your eyes looking for enemies rather than get a cap in your ass for looking at your watch.

Their timers are perfect because they are cheap, rugged, and very lightweight.

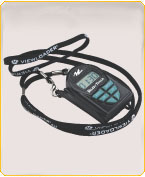
The one I found was $10 on eBay and called the "Talkin’ Timer" (made by Viewloader).
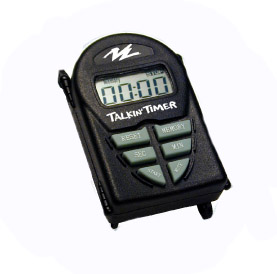
Image Image

A digitized voice (female) will announce the time left every minute. Eg. "5 minutes remaining". There’s one memory preset for that frequently used timer setting. There’s also a mute button.  Unit has no power switch: It just shuts-off automatically when not in use. It comes with a lanyard, which is handy for wearing around the neck (I sling it over one shoulder so it doesn’t get in the way of my radio). If you’ve seen the abuse paintball gear gets, you know this unit is built for durability.

The volume is nice and loud, which is great for outdoor use like RC.

It rocks.  Eyes are always on the fast movin’ plane.

See my other FA-18 tips:

Enjoy,
Donn Lee

HET FA-18: Quick and accurate 65mm block-up for gluing wings

Problem: The assembly instructions say that the wings should be glued-on and blocked-up 65mm from the table surface. And just where am I supposed to find this 65mm block?  Making a custom one sure sounds like a pain in the butt.

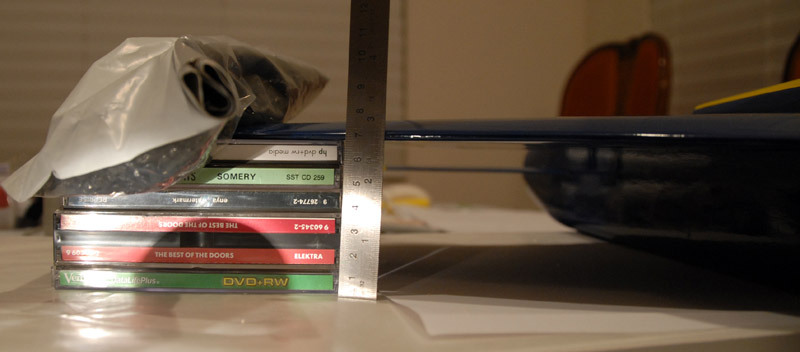
Solution: Go over to your CD collection (you know, that cabinet of round, shiny discs that no one uses anymore). Grab yourself four standard jewel case and one double-disc album case (in my case, The Best of The Doors. oh yeah):

CLICK TO ENLARGE/REDUCE IMAGE !

Image

Voila! A 65mm block up for gluing your FA-18’s wings.

Don’t forget to put some weight on top of the wing so its pressed down on the block-up while the epoxy cures. In the above photo, I used a plastic bag full of aquarium gravel.

Another tip: I like to use white melamine shelf boards for flat gluing surfaces. Found at any home improvement store (or storage/get-yourself-organized store). Cheap, heavy, and very flat.

See my other FA-18 tips:

Enjoy!
Donn Lee

Jig for gluing 110-degree angles for HET FA-18 Vertical Stabilizers

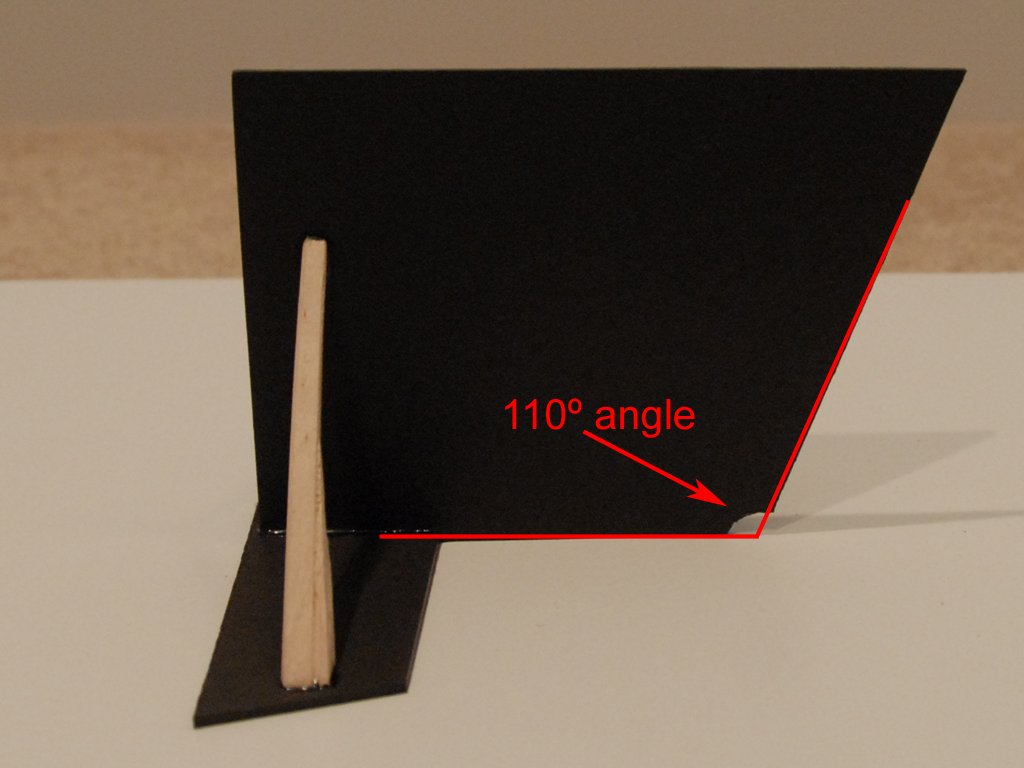
The HET FA-18 ARF kit is not terribly hard to assemble. However, the vertical stabs are probably the trickiest (and most annoying) part. The instructions tell you they are to be glued at 110-degree angles. But, even with a template cut at 110-degrees, it ain’t easy to immobilize those fins while the epoxy cures. Sure, you can use pins, rubber bands, tape, etc., but here’s an option that I like much better.

MAKE A GLUING JIG FOR 110-DEGREE FINS

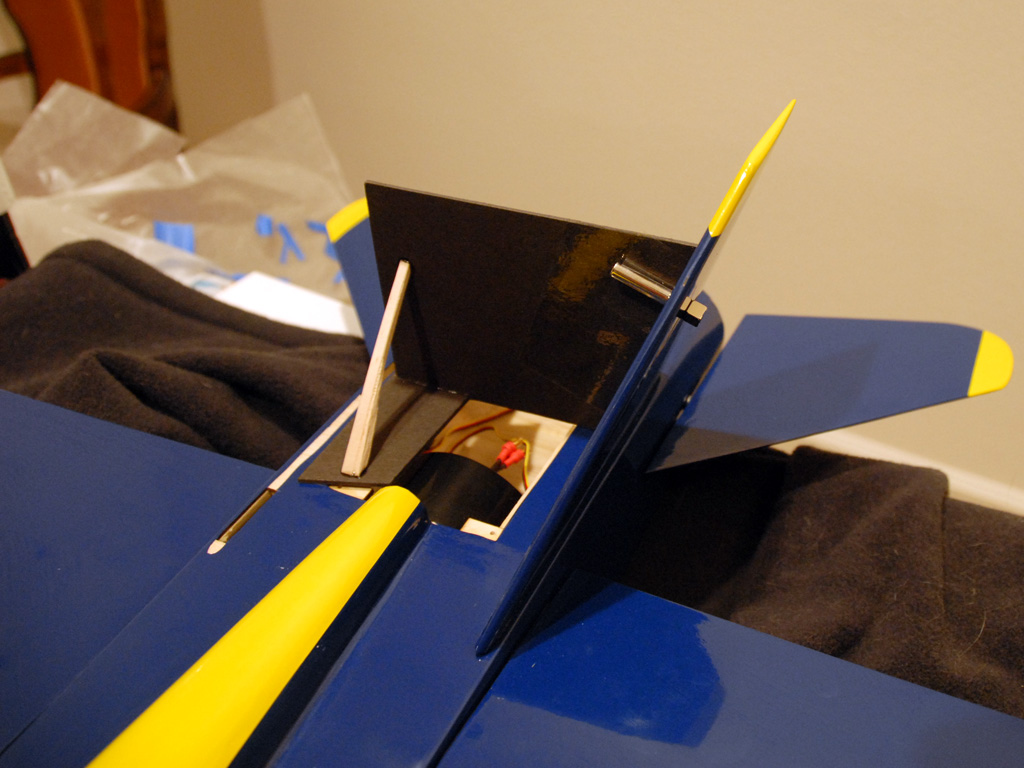
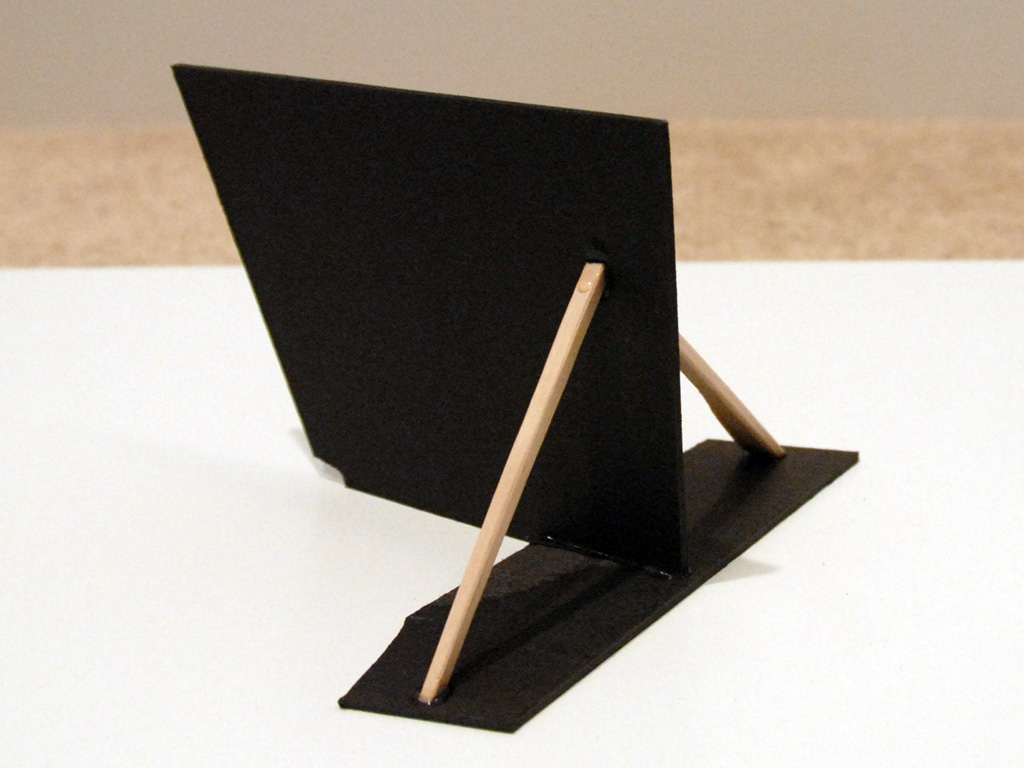
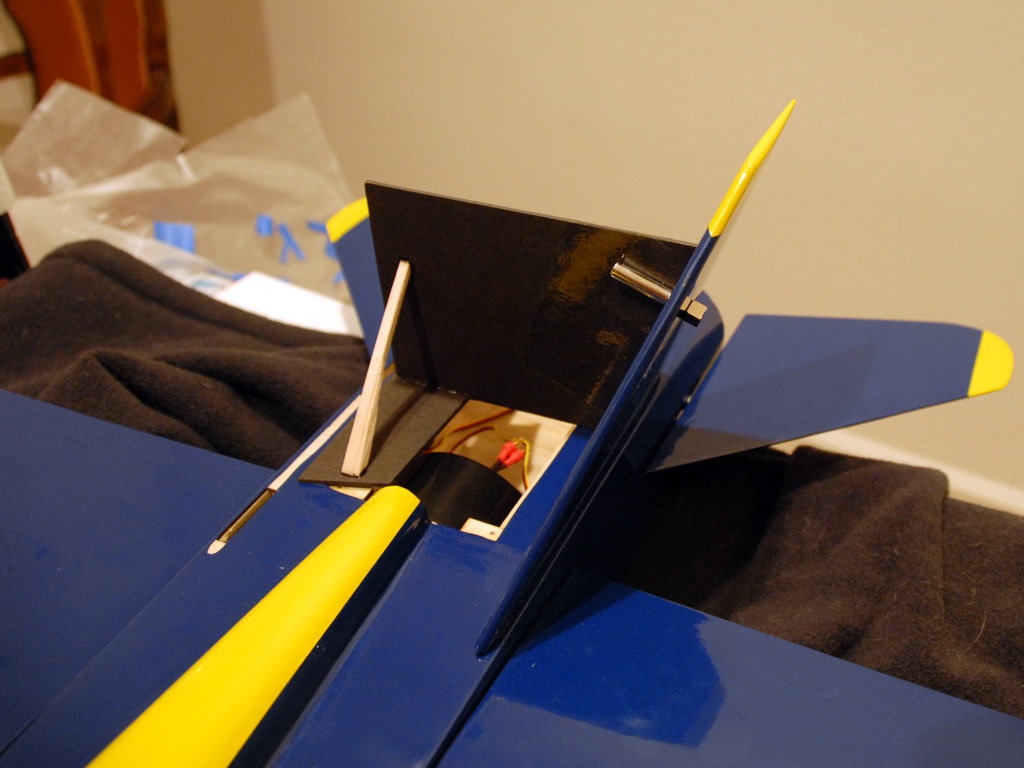
Making a simple gluing jig doesn’t take that much time and it will save you frustration when it comes to gluing the oh-so critical 110-degree vertical stabs.  Here’s a photo that shows the basic idea:

Note: CLICK TO ENLARGE/REDUCE IMAGES !

Image

This glamorized template does two things over the simple 110-degree flat template:

  1. Provides a horizontal footing so the vertical template can stand-up solidly.
  2. Uses rare earth magnets to hold the vertical stab firmly and cleanly (no pins, rubber bands, or tape!).

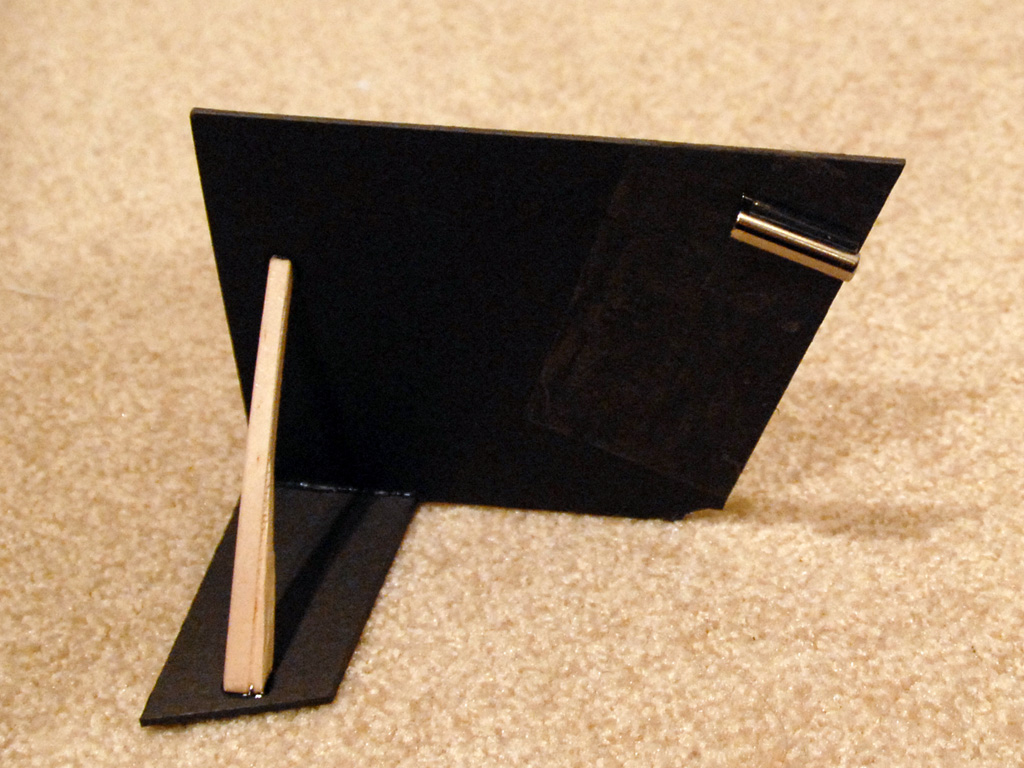
Notice there are two rare earth magnets holding the vertical stab in-place: A cylinder-shaped magnet taped to the jig and a smaller cubed-shaped one on the other side of the stab that is held in place by magnetic force.  It’s like a magnet sandwich that secures the stab to the edge of the jig.

Where to get rare earth magnets: I bought an assorted pack of rare earth magnets from thinkgeek.com ("Curiously Strong Magnets") and they have been useful in many applications around the house and RC. The variety pack has several shapes and sizes. 87 pieces in all. The flat shaped magnets are great for securing a removeable canopy. Great investment for lots of uses that continually come up (love ’em!).

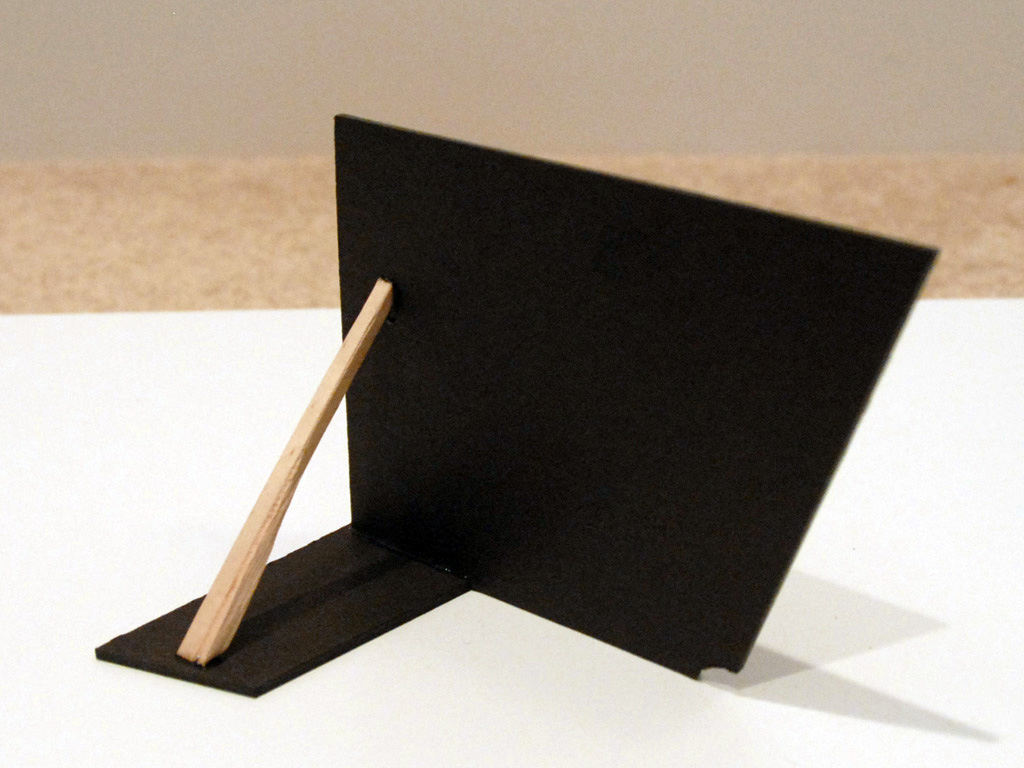
Here are more pics of the jig:

Image Image

The black material is a very thick cardboard backing I found on an old memo pad (it does not flex). I just expoxied pieces of a wooden chopstick to act as support braces. You can’t see it, but there’s a long notch in the corner of the vertical piece that allows the horizontal footing to sit flush with the bottom edge of the vertical piece.

You can see in the following pic that I used a long cylinder shaped magnet and taped it to the jig with clear packing tape:

Image

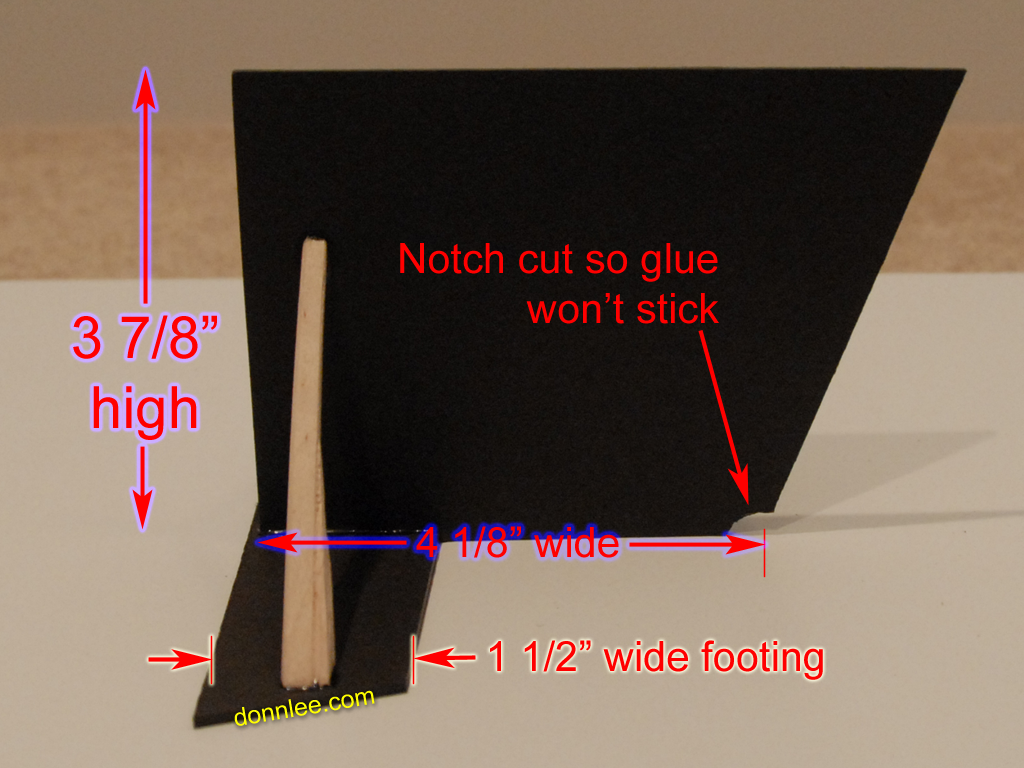
Here are the dimensions:

Image
Image

Note: It is important that the bottom edge of the vertical piece measure 4 and 1/8th inches. This width is narrow enough to allow you to glue the second vertical stab after the first one is done. And this width is wide enough to span the opening left by the absent rear hatch (so the jig doesn’t fall into the fan compartment).

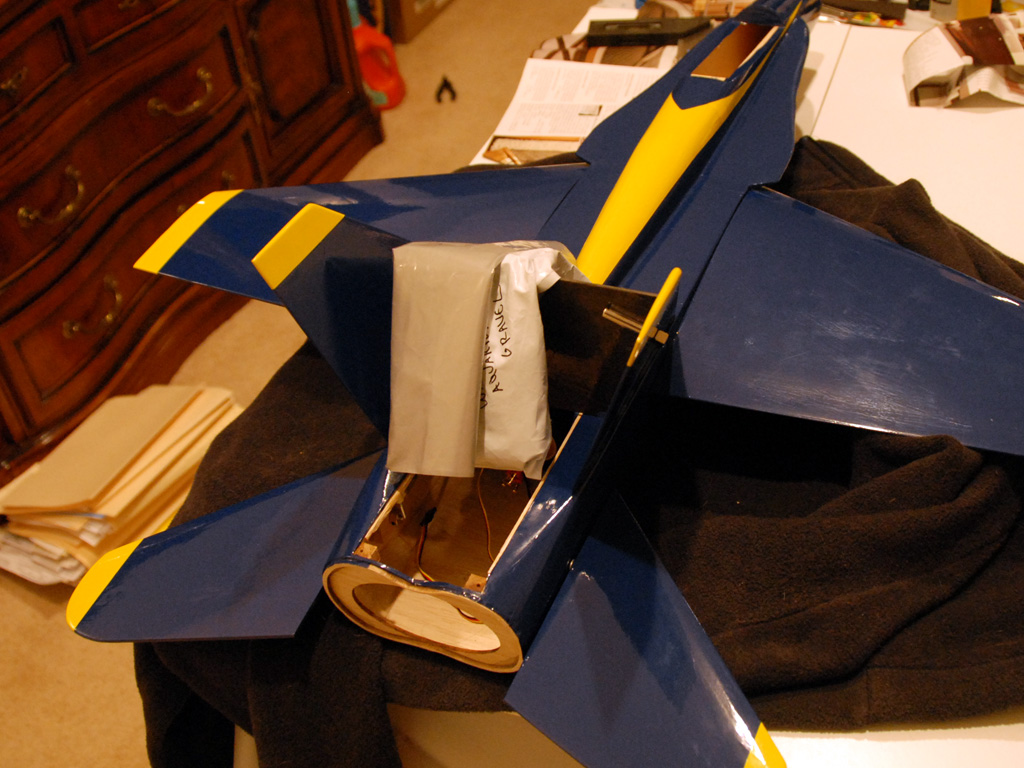
So, I place the jig over the opening, lay down the epoxy, set the stab in-place, and immobilize with the outer magnet:

Image

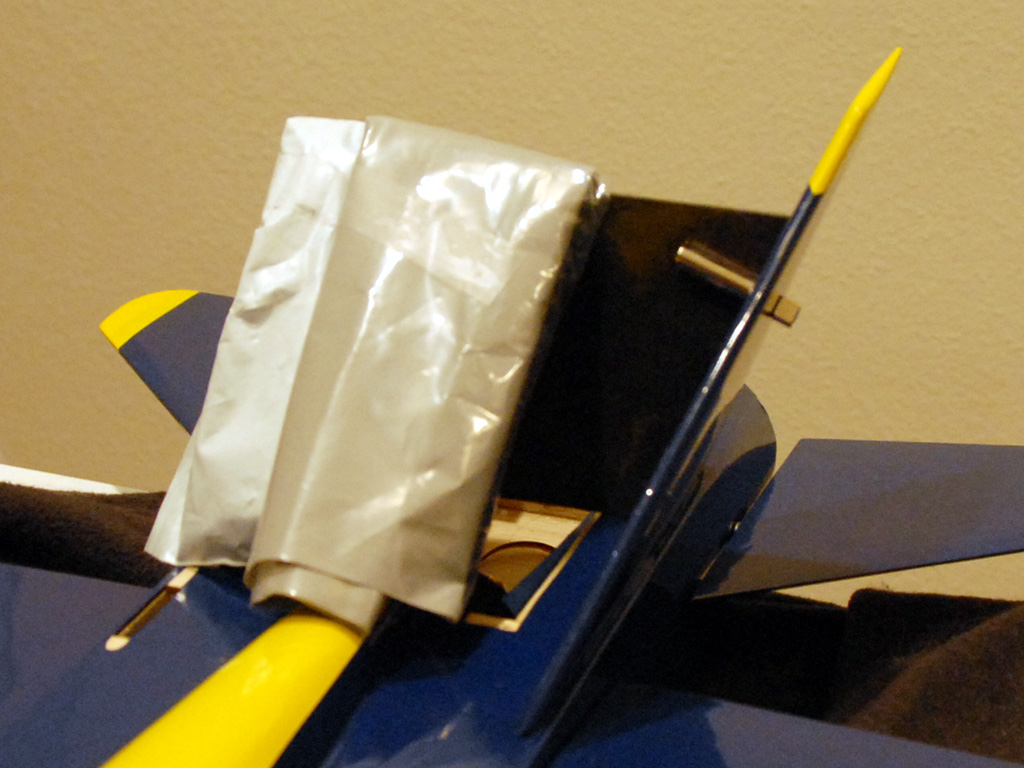
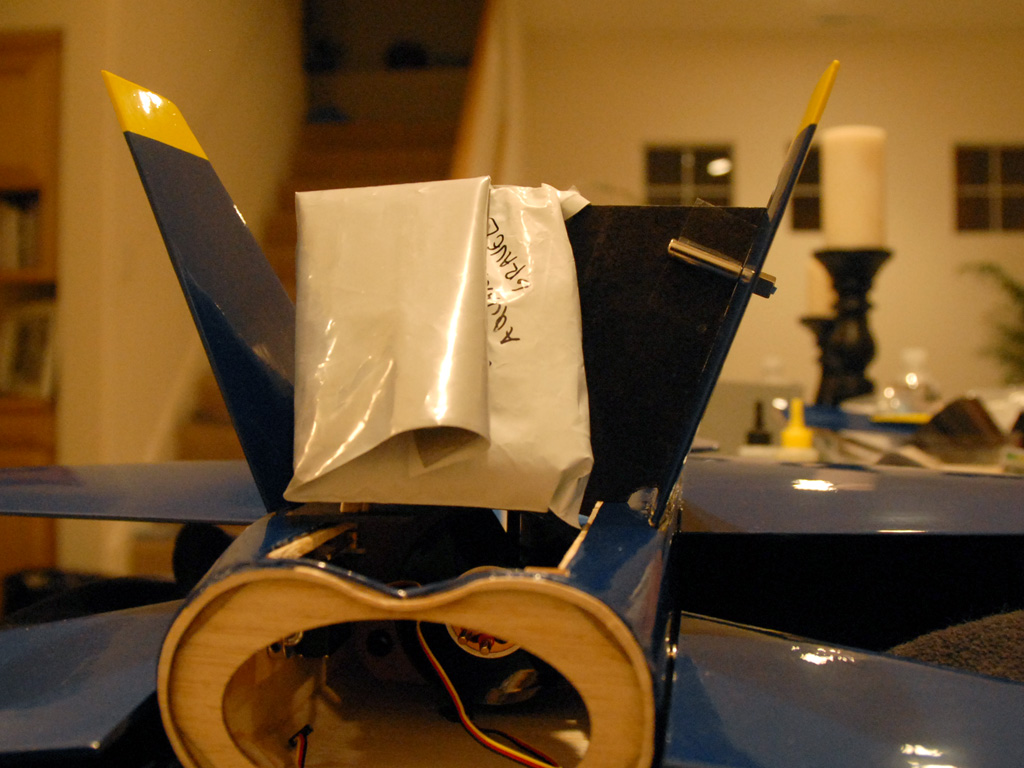
Then, I anchor the jig down with a little weight.  Here I used a small plastic bag of clean, dry aquarium gravel. This keeps the jig from moving around.

Image

THAT’S SO EASY.  And I know that baby is rock-solid and exactly 110-degrees for the entire epoxy curing time.

And then the other side:

Image
Image

A little pre-work saves hassle and errors when it counts!

See my other FA-18 tips:

Enjoy!
Donn Lee

Special thanks to warbirds-rc.com for helping build and fly this great EDF jet.