The goal is to use beacons for room presence with Home Assistant smarthome automation. I always have my iPhone with me, so tracking the phone will quickly locate me in a room or at the front door when I come home.
iBeacon is the protocol (packet format) the beacon will emit. Eddystone and AltBeacon are other protocols. Even though Apple defined iBeacon, any device, eg. Android, can listen to iBeacon packets. Beacon packets are emitted using Bluetooth Low Energy (BLE).
I chose RadBeacon’s “Dot” beacon over their “Chip” beacon because the Dot has a replaceable coin battery, CR2032 (a popular coin battery size).
Radius Networks sells two versions of the Dot: Non-configurable ($11) and Configurable ($14). Get the Configurable model.
Get the RadBeacon Dot working
Download the RadBeacon app from the Apple app store. Launch the app. The first screen will be an empty list of beacons because you haven’t discovered any beacons yet.
Turn on the Dot by clicking the top of it (lighting bolt symbol button) once. The GREEN led will flash once, indicating the Dot is ON. To turn off the Dot, click the button once and the RED led will flash, indicating the Dot is OFF.
With the Dot ON, press and hold the button for about 5 seconds until the GREEN led flashes twice. This indicates the Dot is in CONFIGURABLE mode (config mode, for short).
Swipe down (pull down) on the app’s first screen to scan for nearby beacons that are in config mode.

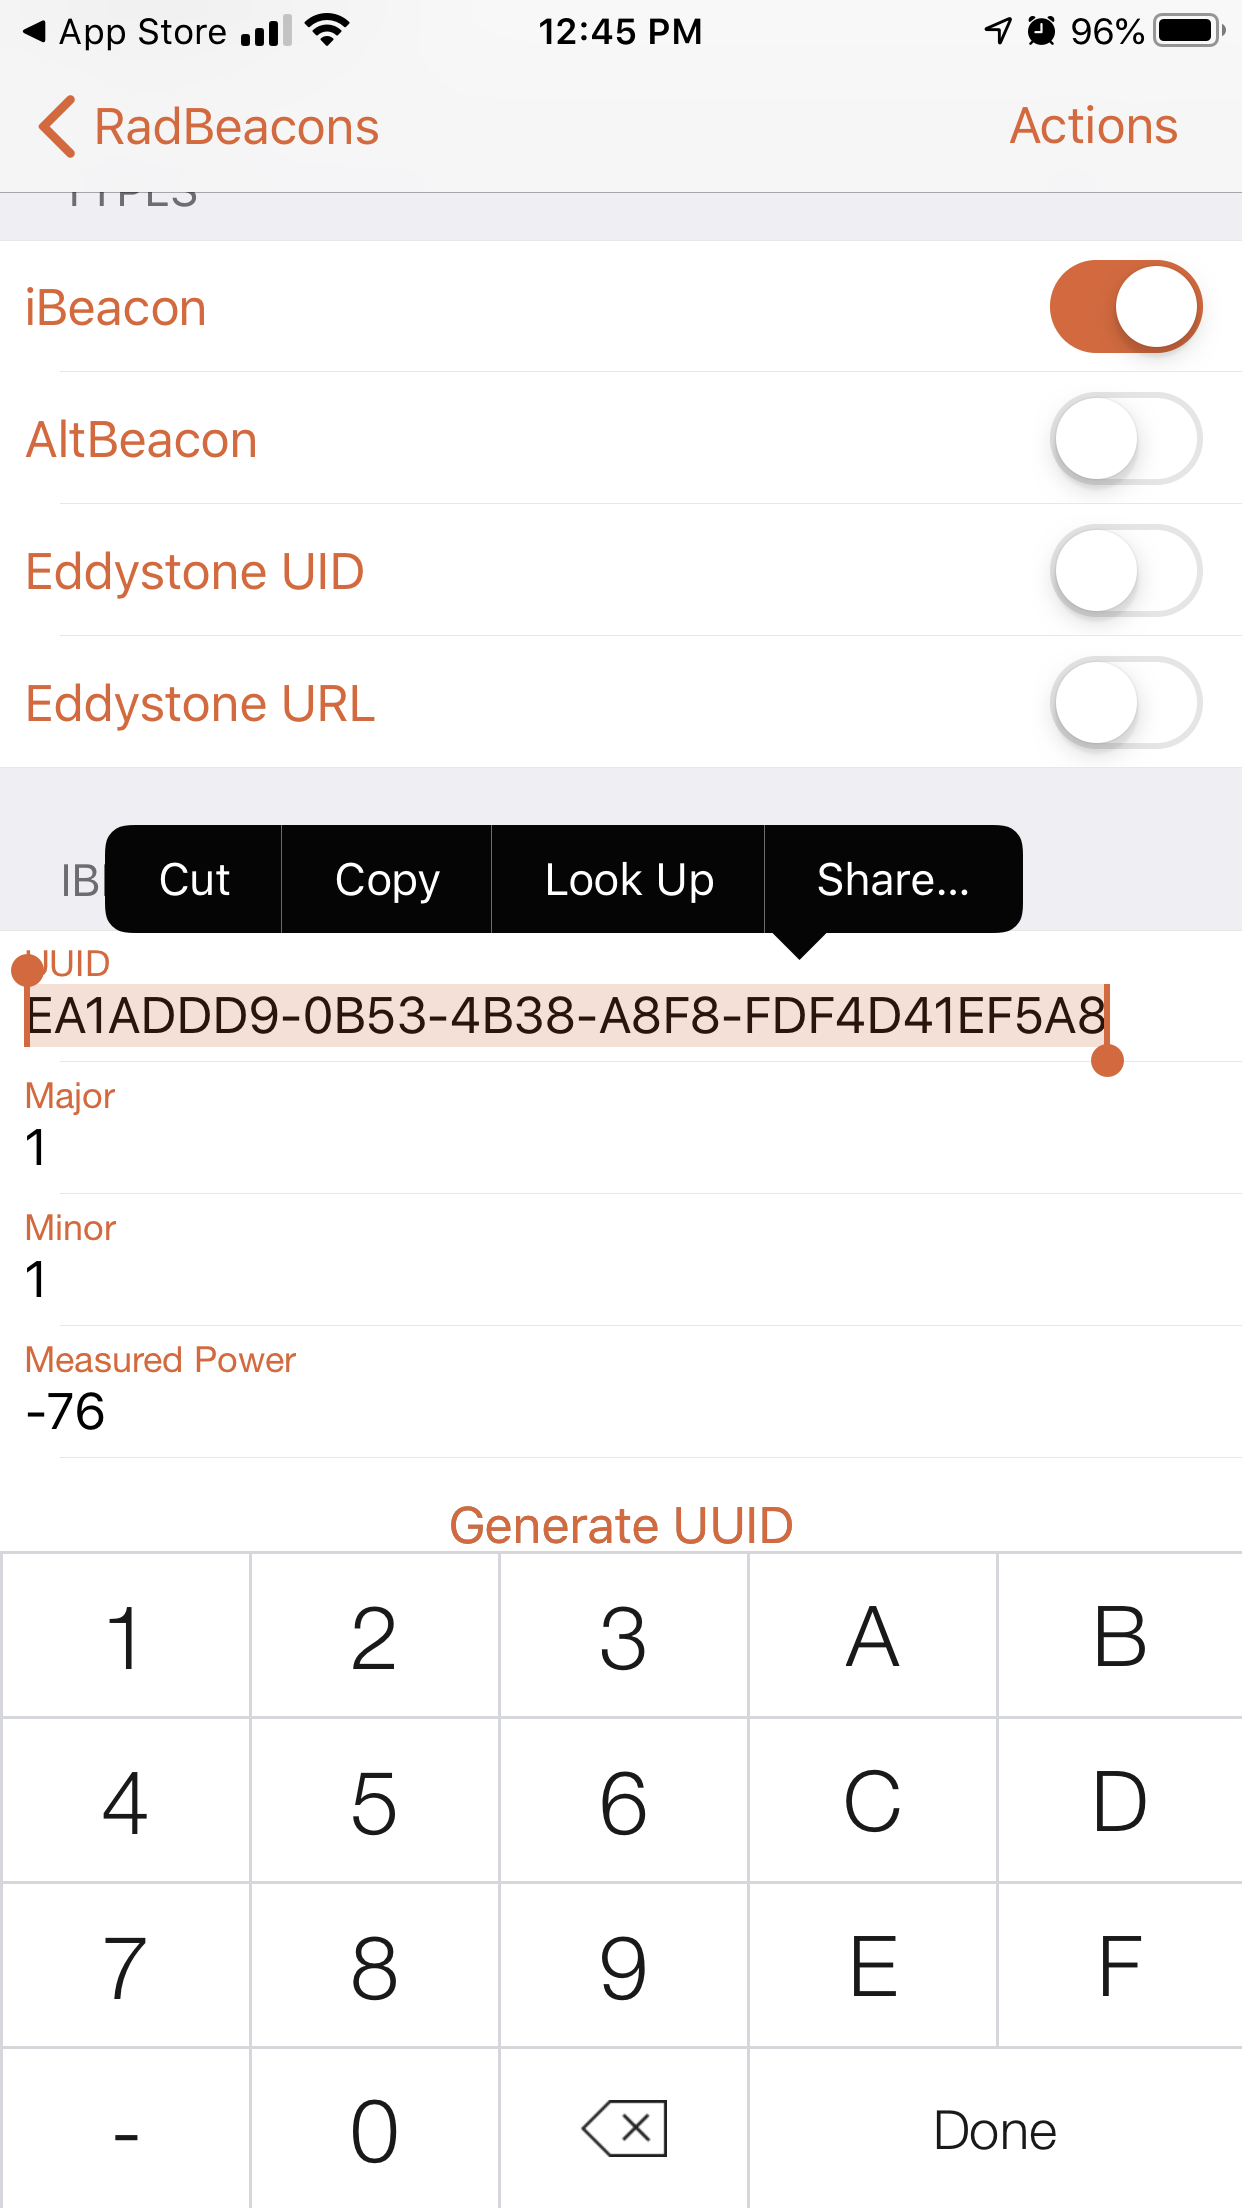
Your new beacon will appear in the list with its name, model, version, id, and battery status. Tap the row for the beacon to see detail and config options.

(I’m not using any of the UUIDs in this article)
In the next screen, you can configure the beacon’s name, type/protocol (iBeacon, Eddystone, AltBeacon), UUID, major & minor numbers, advertising rate, and transmit power.
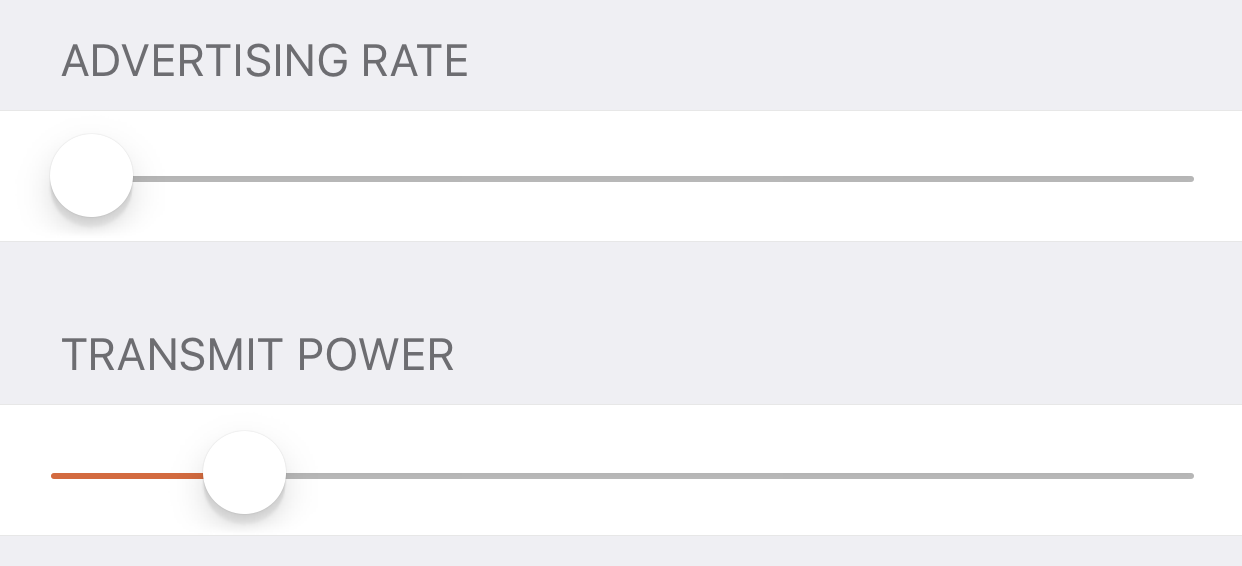
To extend battery life, I decided on an Advertising Rate of 1 time per second (1000ms, or 1Hz), the lowest setting. This should be quick enough for room presence applications. For Transmit Power, see below.
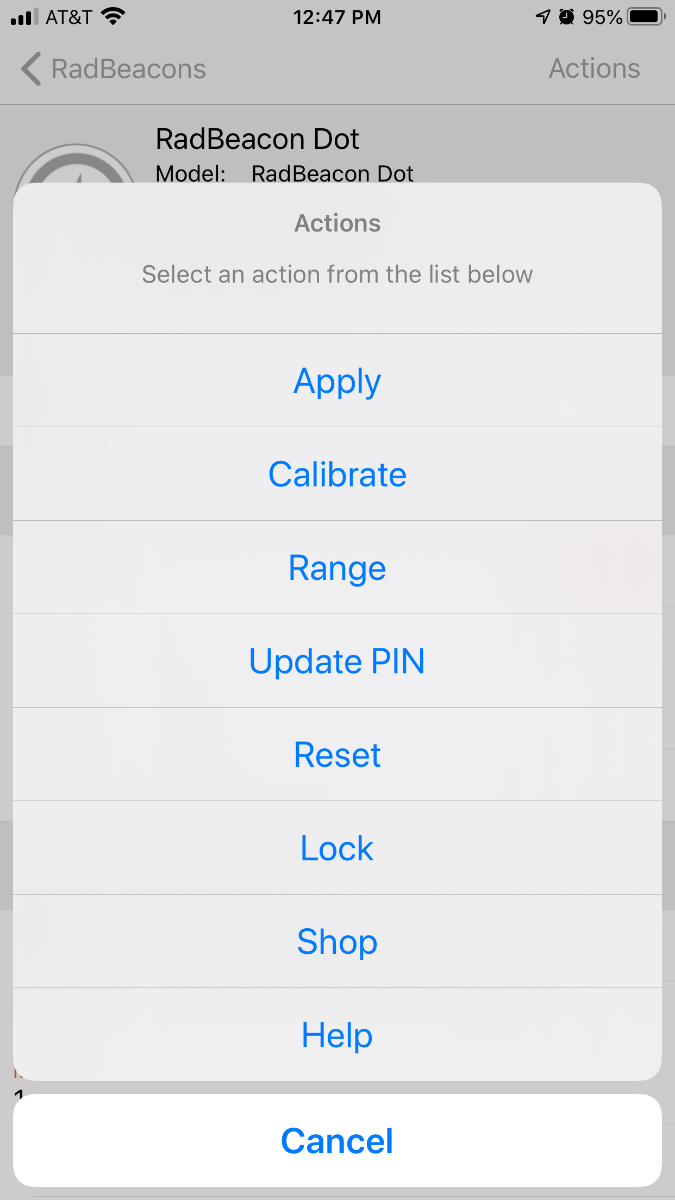
After you setup everything, tap “Actions” in the top-right of the screen and tap “Apply” in the actions menu.
If it asks to calibrate to the measured power, tap “Yes”. The app will ask for the Dot’s PIN, which by default is 00000000 (eight zeros). Now the Dot is configured.
To determine a suitable Transmit Power, you can tap “Actions” in the top-right of the screen and then tap “Range” in the action menu.

This will run a utility that shows, in real-time, how close your iPhone is to the beacon in meters. “Immediate” means the phone is super-close to the beacon. “Unknown” means the phone doesn’t “see” the beacon and so is out-of-range. Play with different Transmit Power (measured in dBm) strengths and use the “Range” tool to tune the detection range to your liking.
You can copy-paste your Dot’s UUID from here to another app like OwnTracks:
If the Dot will be in an area where people could reconfig it: Tap “Actions” and then “Update PIN” to change the Dot’s default PIN, 00000000 (eight zeros), to a custom PIN. Save the PIN in your password manager, eg. LastPass. In reality, few will know what a beacon is and even fewer will want to reconfigure it. Most likely, someone will just steal it and play with it later, so maybe mount it high off the ground if you’re worried.
Click the Dot’s button to exit config mode (green led flashes once). Config mode consumes a lot of battery, so exit config mode as soon as possible after you are done configuring your Dot. The Dot should automatically exit config mode after 30 minutes (not tested).
There was an academic project that estimated the battery life of the Dot. Title of the paper is “ARCTIC: An IoT-based System for Child Tracking in Day Care”.

#
Nice writeup. I was considering the chip until I saw your post about not having a cr2032. How long was your battery life in your experience so far. Did you just stick the dot into your phone or was it stationary (wasn’t clear from the blog)?
Thanks
@Smashteevee, the battery life was about 4-6 months with the Dot set to low-power, advertisement rate. I have Dots planted around the house, so they are stationary. When my iPhone gets close to one, the smarthome (Home Assistant) is informed that I’m in that part of the house. I have one Dot on a keychain. I’ve also deployed Room Assistant on Raspberry Pi Zero units, and they seem to be more reliable at tracking my room presence than the Dot beacons.