I want Home Assistant to quickly know when I arrive home, and waiting for my iPhone to connect to my Unifi wifi is too slow, too late, because I don’t blast my wifi APs at full-power to reach very far outside. When my iPhone is close to my mailbox would be a suitable trigger.
It would also be nice to track when I’m in the bedroom for more than 2 hours, after 10pm, to trigger “I have gone to sleep” automations. Ditto for “It’s morning, and I have woken up” automations. These are easily buildable in Node Red.
Setup your iBeacon/beacon
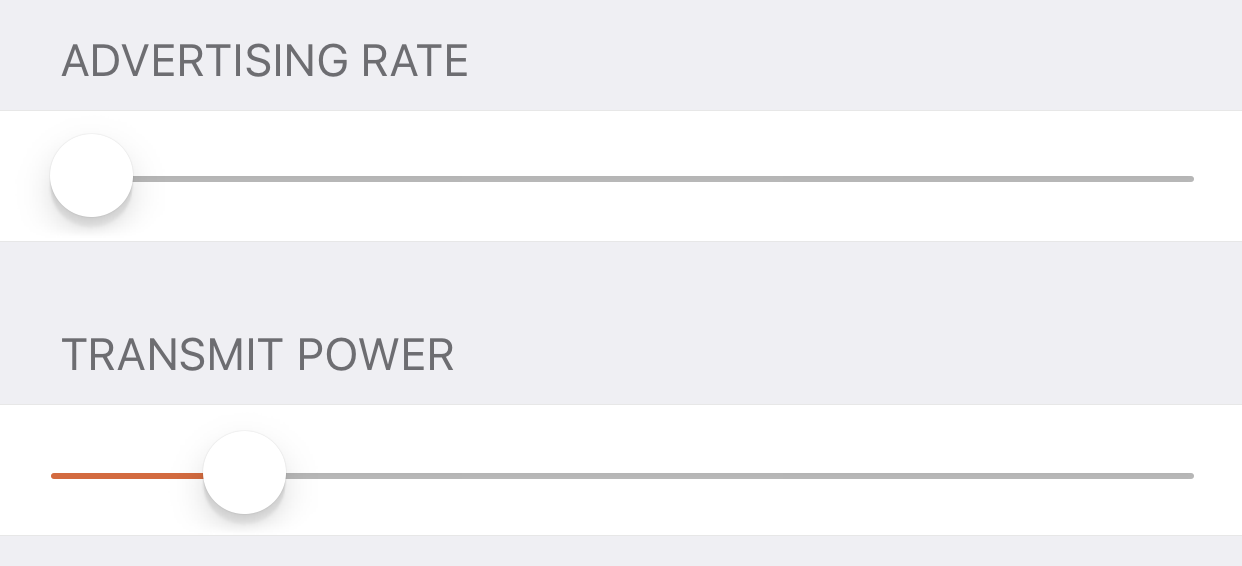
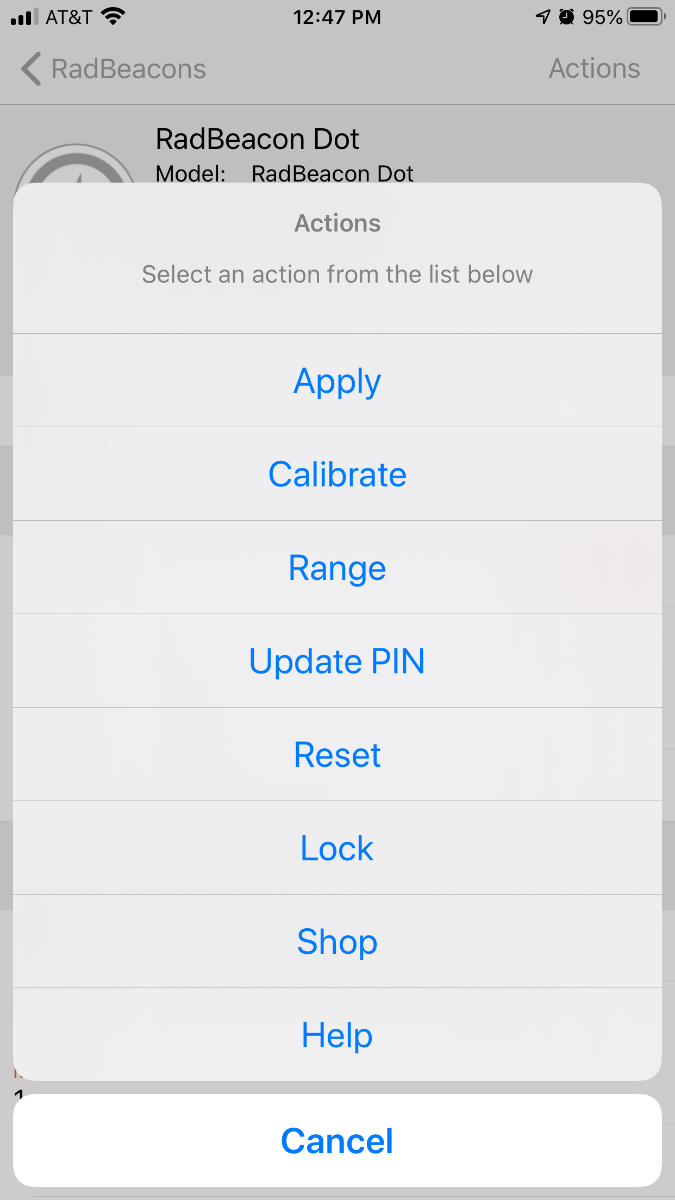
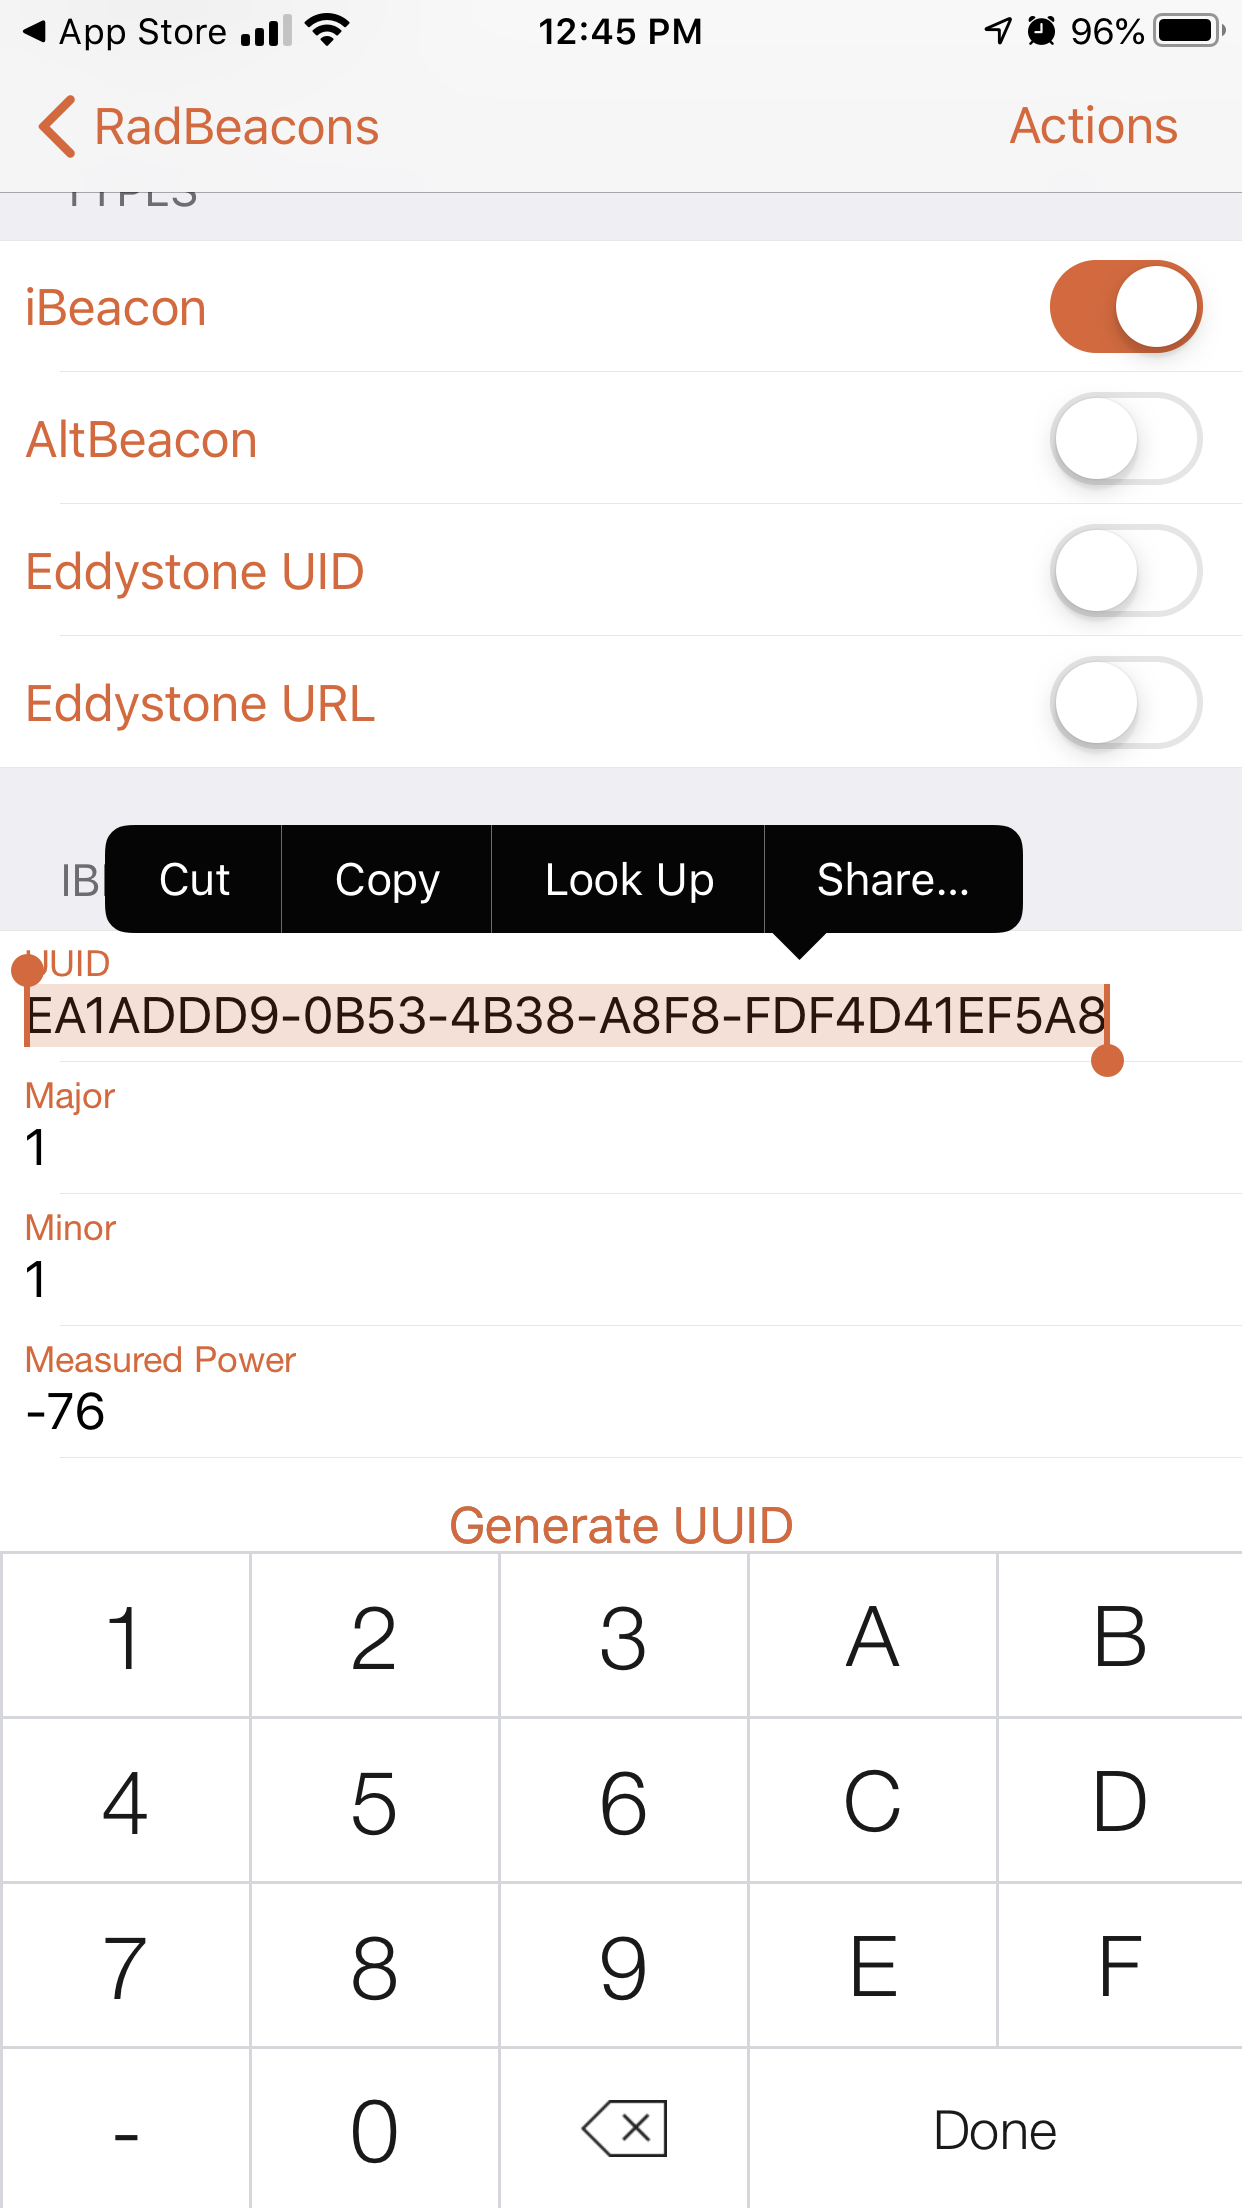
First, setup & configure your iBeacon/beacon. Article: How-to for RadBeacon Dot beacons
Install the Home Assistant OwnTracks integration
Using the Home Assistant web-ui front-end, install the OwnTracks integration.
Configuration > Integrations > “+” icon, and search for “owntracks”.
Copy the instructions and especially the URL and “secret” it gives you and stash it somewhere safe.
“entity-id” in this article is the Home Assistant entity ID.
Setup the OwnTracks iOS app
Install the OwnTracks app from the Apple app store.
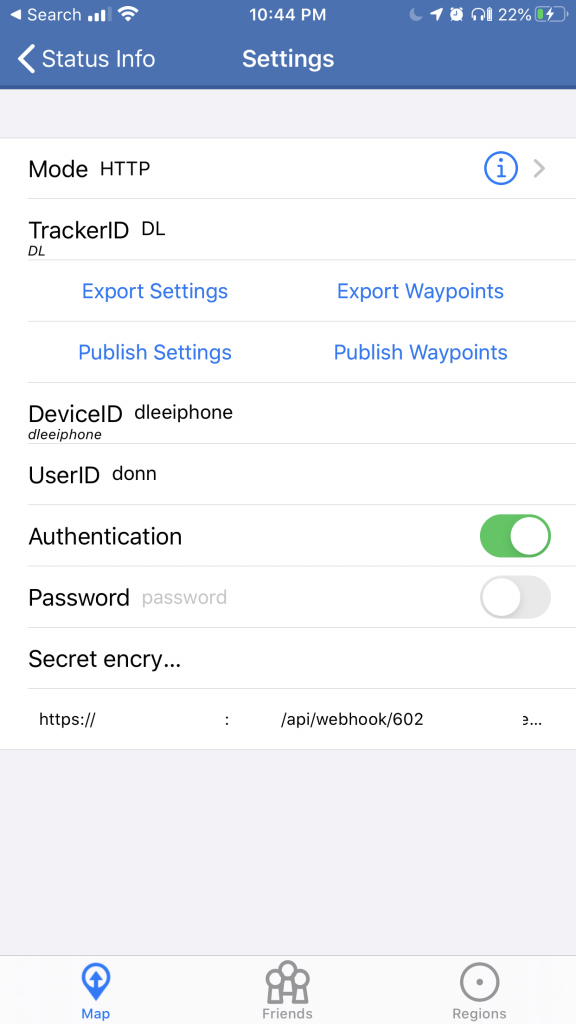
In the OwnTracks iOS app, follow the instructions just given by the Home Assistant OwnTracks integration to configure the app’s settings:
- Change the
Mode to HTTP
- Create a
TrackerID (two letters, like initials for your first & last name)
- Create a
DeviceID that will appear in the entity-id
- For
UserID, enter your first name, alias/username, or any name you want (it will also be part of the entity-id)
- Enable
Authentication
- Leave
Password empty, and enabled or disabled doesn’t matter
- For
Secret encryption key enter the long string of characters that the Home Assistant OwnTracks integration gave you as encryption key . This must match the Home Assistant OwnTracks integration and is the shared key the iOS app and your Home Assistant backend will use to securely communicate region enter/leave events.
Create a region assigned to the beacon
In the OwnTracks app, create a region represented by your iBeacon/beacon:
- Tap “Regions” at the bottom of the main screen.
- On the Regions screen, tap the “+” icon in the top-right to create a new region.
A region in OwnTracks maps to a zone in Home Assistant.
In the region settings, give the region a name and add your beacon’s details:
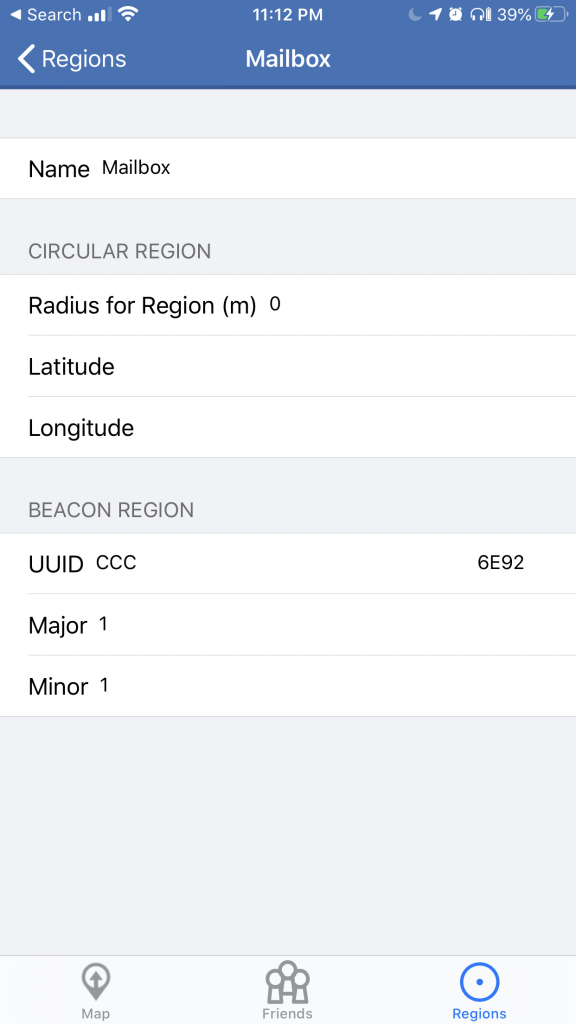
For beacon-based regions (rather than GPS-based regions), the radius should be set to 0 (zero) per the docs. Paste the beacon’s UUID. If you are only tracking on UUID, leave major & minor numbers empty. Else, enter the beacon’s major & minor numbers.
You can also track on UUID and major number (no minor number). It all just depends on your application. For example, some people organize their beacons by a single UUID for the whole museum, major number for a wing in the museum, and a minor number for an exhibit within a wing.
You can also have multiple beacons with the same UUID and major/minor numbers, and spread them around the house. This would be something like a super-region that covers the whole house. But then, why not use wifi-based presence?
NOTE: Some docs out there haven’t been updated and tell you to ensure share is enabled in the region’s settings. This setting has been removed in the latest version of OwnTracks iOS (May 2020). All regions are shared by default now.
Create a new zone for the region
Create a zone that matches the OwnTracks region to your Home Assistant configuration.yaml file:
zone:
  - name: Mailbox
    latitude: 47.4
    longitude: -100.1
    radius: 5
Optionally, configure the OwnTracks integration to process region enter/leave events only (ignore location/GPS updates):
owntracks:
  events_only: true
And restart Home Assistant.
Tracking when your iPhone enters the beacon’s region
In Home Assistant, the entity-id has the format:
device_tracker.<UserID>_<DeviceID>
I created a beacon named Mailbox and a Home Assistant zone also called Mailbox. The settings I used in the OwnTracks iOS app were donn for the UserID and dleeiphone for the DeviceID.
So, when I am close to the beacon located inside my mailbox, the entity device_tracker.donn_dleeiphone changes to state Mailbox.

Notice that the source_type is bluetooth_le (BLE), which makes it easy to find all beacon-based entities.
Additionally, a Home Assistant logbook entry is created:

And when I walk away from my mailbox, device_tracker.donn_dleeiphone changes to state home because I am too far from the mailbox but still at home.

Now I can trigger automations in Node Red using the state of that entity-id.
But… when leaving the house?
When I leave the house, I pass by the mailbox and I don’t want this to be interpreted as an arrival home. So there’s simple logic in a Node Red flow to check that I was away from home (aka not_home state), according to other entity-id’s, for at least 20 minutes before entry into the Mailbox region is considered an arrival home.
Latency/Reaction time
In practice, I’m seeing the state change from not_home to Mailbox in less than 10 seconds (sometimes less than 5 seconds). The change from Mailbox to home usually takes longer: more like 20-30 seconds. There may be a timeout in the app that waits before declaring the iPhone has left the region assigned to the beacon.
Beacons that move
The beacon itself can move, so the beacon has its own entity-id with a state value that will change to reflect the last-known location Home Assistant has for the beacon. For example, you can put a beacon in your backpack and watch its state change from home to work. Where the state values are names of zones you have created.
So if you named a beacon backpack, the entity-id would be device_tracker.beacon_backpack and the state of that entity would change from home to work zones (example).
The beacon is dumb. This is possible because your smartphone is close to the backpack beacon and OwnTracks is telling Home Assistant that it’s close to backpack with a GPS coordinate of X,Y (lat, long). You can track where you parked your car in the same way.
In the OwnTracks app, beacons that change location should have their region settings set to a radius of -1 . See the docs.
#